Foreword
Thank you for purchasing HiBy’s new generation portable digital audio player, the HiBy RS6. To help you get the best out of the HiBy RS6, this user guide has been compiled to introduce you to the HiBy RS6’s features and how to use them. Please read thoroughly in the first days of ownership.

Operation and ports explained
Power on/off, restart, screen locking / unlocking
1.Power on: press and hold power button for two seconds
2.Power off / restart: hold power button while HiBy RS6 is powered on to bring up power off / restart option screen; (press briefly to unlock the screen first if it is locked)
3.Lock screen: Press power button briefly while RS6 is powered on to lock / unlock screen;
4.Turn on screen: when HiBy RS6 is powered on with screen off, press power button briefly or double-tap the screen to turn it on.
Operating System
The HiBy RS6 sports a lightly customized Android 9 operating system which may be operated in the same way as most smartphones, including the installation of 3rd party audio and general apps and use of the Play Store;
1.Music player app
Preloaded with HiByMusic Professional edition, specially customized for HiFi digital audio players for powerful features, perfect sound and ease of use;
3.5mm and 4.4mm line out
Auto line out mode switch: the device automatically detects when it is connected to an amplifier rather than headphones and switches automatically to Line Out mode.
Coaxial digital audio output
The HiBy RS6 includes a coaxial digital output in its type-C USB port, which may be utilized using the including the type-C to RCA adapter cable included in the package. The player defaults to this coaxial digital output when no other audio output connections are detected (conversely, this output is muted when any other connections are detected).
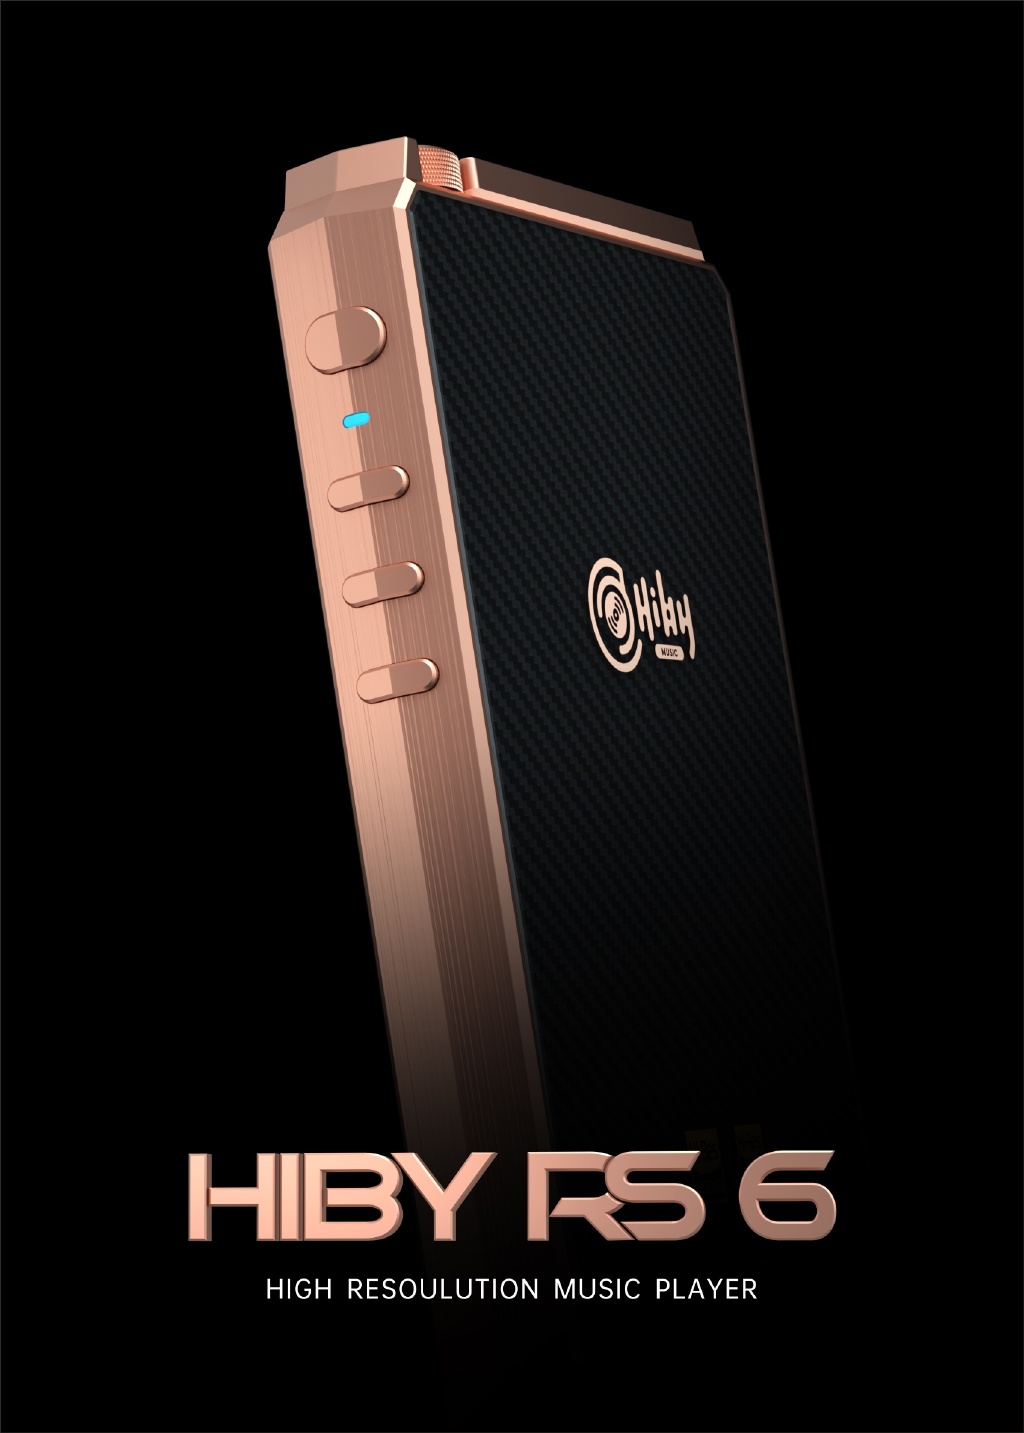
RGB LED
1.The LED on the HiBy RS6 power button doubles as an indicator light for the audio format being sent to the DAC:
2.Not playing—pale blue
PCM:
48kHz and under—blue
64-192kHz—green
>192kHz—orange
All DSD: white
3.Charging: red (pulsating one cycle in 5s in quick charging, one cycle in 10s in slow charging)
Micro SD card installation
Card sizes of up to 2TB are accepted.
Type-C USB 3.1 port
File transfer / digital audio input / output
1.Android File Transfer;File transfer: connect the HiBy RS6 to the computer via the provided USB type-C cable. After this, pull down the notification shade on the HiBy RS6, scroll down to the bottom and tap twice on “USB for charging”, then select “File transfer” in the menu. Now the HiBy RS6 will function as an MTP storage device for file transfer. On a Mac it is necessary to also install Android File Transfer to enable MTP file transfer.
2.USB Digital audio output
a.Connect USB DAC / amps to the HiBy RS6 USB type-C port; bit-perfect output is supported via HiByMusic up to DSD512/PCM768 kHz.
b.HiBy RS6 supports systemwide passthrough USB mode in third-party app output.
3.Acting as USB DAC
a.connect the HiBy RS6 to the computer via the provided USB type-C cable. After this, pull down the notification shade on the HiBy RS6, scroll down to the bottom and tap twice on “USB for charging”, then select “USB DAC in” in the menu.
b.On windows 7 it would be necessary to install the USB audio driver for this; go to store.hiby.com -> Scroll to bottom -> Click “download” under Support -> “USB DAC Driver & Guidance” -> “HiBy RS6 USB DAC Driver Download and Installation Guide”
Wireless connectivity
1.Bluetooth 5.0
Connect the HiBy RS6 with new Bluetooth audio devices as follows:
a.Pull down the notification shade then pull down again to expand the list of quick status indicator buttons; press and hold on the Bluetooth icon to enter the Bluetooth setup screen;
b.Turn on the Bluetooth master switch;
c.Tap “Pair new device” to search for nearby Bluetooth devices (set the Bluetooth device to be paired to broadcast or pairing mode according to its instructions)
d.Tap on the name of your Bluetooth device on the HiBy RS6 to pair with it; once successfully paired, it will appear under the list of “paired devices”.
2.WiFi
The HiBy RS6 supports both 2.4GHz and 5Hz WiFi. Apart from using it to connect it to the internet for music streaming, internet etc., it can also be used for music transfer, remote control via HiByLink and/or playing music from network resources via DLNA / LAN etc.
Fireware update
Over-the-air online update
1.Connect to the Internet; WiFi connection is recommended to save on data costs;
2.The HiBy RS6 will automatically detect new firmware versions online and prompt you to update via notifications; tap the notification to update;
3.You may also manually check for, download and install updates using the FOTA Update app;
4.Please note that roll-back to old firmware versions is not supported on Android devices.
Direct Transport Audio architecture for lossless digital audio on Android
1.HiBy’s proprietary modifications to the Android audio stack, trademarked DTA, allows audio from any [Android app that does not actively resample audio before sending it to the audio stack] to pass unaltered directly to the DACs onboard;
2.HiByMusic on the HiBy RS6 can output all supported PCM and DSD audio formats directly to the DACs; apps that actively resample will output at a certain sample rate on other Android devices.
Special operations
Factory reset
1. Turn off the HiBy RS6;
2. Press and hold the previous button and then the power button at the same time for a few seconds. The HiBy RS6 will power on but then an Android lying on its back will appear;
3. Now press and hold the power button and then press the previous button at the same time;
4. Use previous and next buttons to move the selection and the Power button to activate it. Move the selection to “Wipe data / factory reset” and activate it. (Please back up all data on your device before doing this as all data on the HiBy RS6 will be deleted).
Forced reboot
While the HiBy RS6 is powered on, if there is any software malfunction blocking usual access to the power off / reset menu, you may press and hold the next song + power button for 15 seconds to perform hardware reset.